
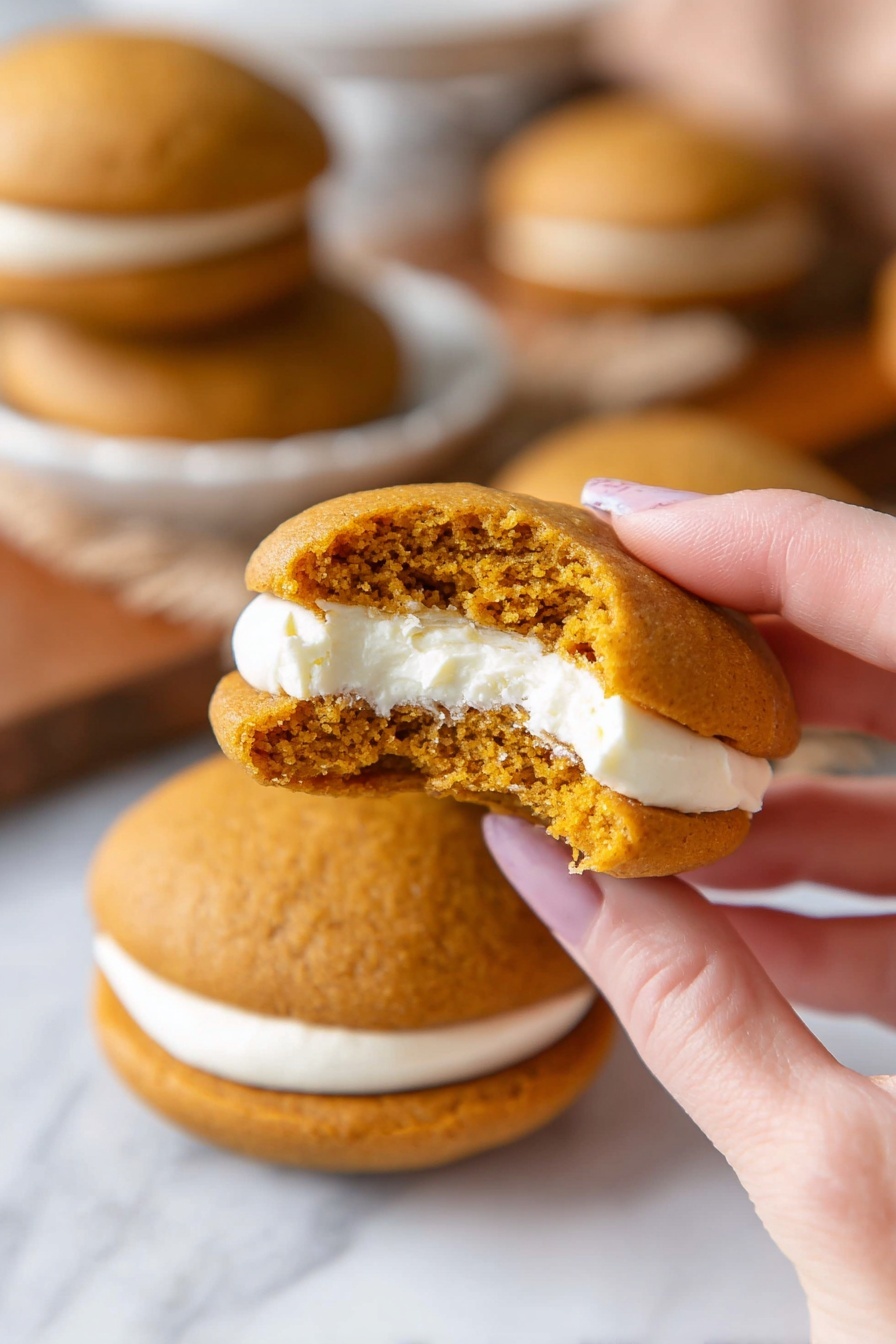
There’s something so comforting about soft, spiced pumpkin cookies sandwiching a fluffy marshmallow cream — that’s exactly why the Pumpkin Whoopie Pies with Marshmallow Cream Filling Recipe always feels like a warm hug on a cool day. Making these treats is honestly a bit like creating a little celebration on your kitchen counter, and once you try them, they’re hard to resist sharing (or not!).

Jump to:
- Why You'll Love This Recipe
- Ingredients & Why They Work
- Make It Your Way
- Step-by-Step: How I Make Pumpkin Whoopie Pies with Marshmallow Cream Filling Recipe
- Top Tip
- How to Serve Pumpkin Whoopie Pies with Marshmallow Cream Filling Recipe
- Make Ahead and Storage
- Frequently Asked Questions:
- Final Thoughts
- Pumpkin Whoopie Pies with Marshmallow Cream Filling Recipe
Why You'll Love This Recipe
I can’t tell you how many times I’ve whipped up this Pumpkin Whoopie Pies with Marshmallow Cream Filling Recipe during fall gatherings—it captures that perfect mix of cozy and festive that keeps everyone coming back for more. Plus, it’s surprisingly easy to make!
- Perfectly Soft Texture: These whoopie pies come out pillow-soft every single time, thanks to the pumpkin and oil combination in the batter.
- Flavor Explosion: The warm pumpkin pie spice blends with rich vanilla and sweet marshmallow for flavor that feels like fall on your tongue.
- Foolproof Filling: The marshmallow cream cheese frosting is easy to make and just the right balance of sweet and tangy, so it complements the pumpkin cookies perfectly.
- Great for Sharing: These treats look charming and festive, making them a hit gift or party addition that’s sure to impress.
Ingredients & Why They Work
Each ingredient in this Pumpkin Whoopie Pies with Marshmallow Cream Filling Recipe plays a special role in creating that perfect soft cookie and creamy filling contrast. Using simple pantry staples means you probably already have what you need to get baking!
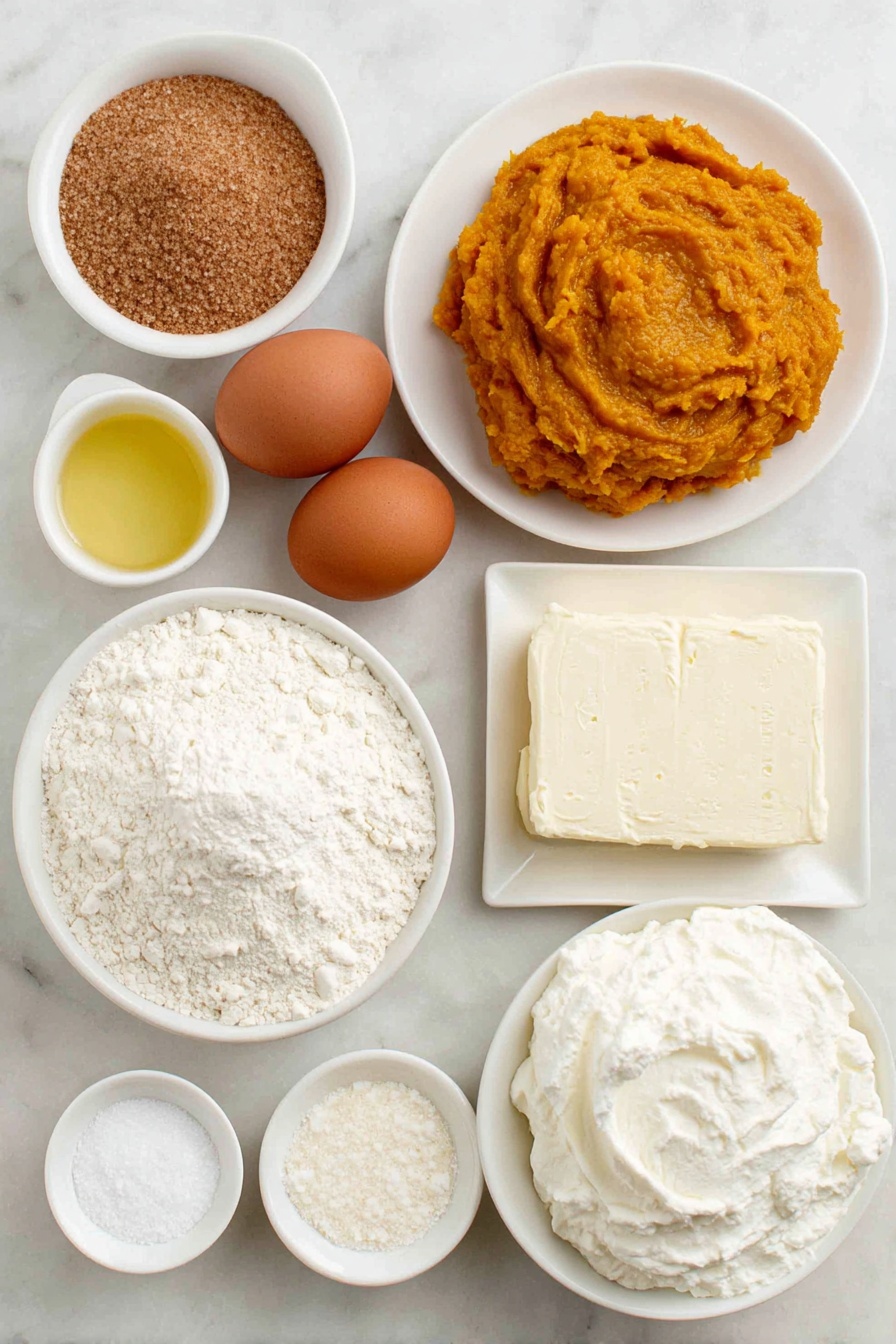
- Brown Sugar: Adds moisture and a slight caramel depth that pairs beautifully with pumpkin.
- Sugar: Sweetens and helps with cookie browning for that inviting golden color.
- Vegetable Oil: Keeps the cookies tender and soft—try not to substitute with butter as it changes the texture.
- Eggs: Bind ingredients and add richness.
- Vanilla Extract: Boosts the warm flavors and the subtle nuttiness of pumpkin.
- Pumpkin Puree: The star of the show! Make sure it’s pure pumpkin, not pumpkin pie filling, for best taste and texture.
- All-Purpose Flour: Provides structure but still keeps cookies soft thanks to the amount used.
- Pumpkin Pie Spice: A fragrant mix of cinnamon, nutmeg, and cloves that instantly boosts seasonal vibes.
- Baking Soda & Baking Powder: These leavening agents make sure your cookies rise just right and stay soft.
- Salt: Balances sweetness and enhances all the flavors.
- Cream Cheese (for filling): Adds tang and creaminess, making the frosting feel luxurious.
- Marshmallow Cream: Contributes that irresistible fluffy sweetness and the “ooey-gooey” factor.
- Powdered Sugar: Sweetens the filling and helps achieve a smooth, pipeable consistency.
Make It Your Way
One of the best parts about this Pumpkin Whoopie Pies with Marshmallow Cream Filling Recipe is how flexible you can be. I love switching things up depending on the season or occasion, and you should too—it’s all about making the recipe yours.
- Spice It Up: Sometimes I add a pinch of ground ginger or cloves to amp up the warmth and add a little extra punch of seasonal flavor.
- Swap the Filling: If cream cheese isn’t your favorite, try a simple marshmallow buttercream by mixing marshmallow fluff with butter and powdered sugar for a sweeter filling.
- Gluten-Free Option: A blend of gluten-free flour works well here—just be sure your baking powder is gluten-free too!
- Mini Whoopie Pies: Reduce the scoop size to make bite-sized versions perfect for parties and little hands.
Step-by-Step: How I Make Pumpkin Whoopie Pies with Marshmallow Cream Filling Recipe
Step 1: Whisking Together the Wet Ingredients
Start by preheating your oven to 350°F and lining your baking sheets with parchment or silicone mats. In a big bowl, I mix the brown sugar, sugar, vegetable oil, eggs, and vanilla until it’s silky smooth and well combined. This step came together easier once I switched to a sturdy whisk instead of a fork—less mess, more smooth batter!
Step 2: Adding Pumpkin Puree
Next, stir in that gorgeous pumpkin puree. I like to use the canned variety labeled “100% pumpkin,” to avoid the extra sugar and spices found in pie filling cans. It’s important the puree is thick and not watery; if it seems too runny, gently drain a bit with a fine mesh to keep your cookies from spreading too much.
Step 3: Mixing in Dry Ingredients
In a separate bowl, whisk together all-purpose flour, pumpkin pie spice, baking soda, baking powder, and salt. Then gradually add this dry mixture into the wet ingredients, stirring just until combined. Be careful not to overmix — your cookies will be softer and fluffier if the batter stays a bit lumpy.
Step 4: Scooping and Baking
Using a cookie scoop (I use a size 40 which holds about 1½ tablespoons), drop dough balls evenly spaced on your prepared pans. I bake one sheet at a time to ensure even heat, for about 8–10 minutes, or until the edges just start to set but still feel soft in the center. Trust me, overbaking will make them less pillowy, so keep a close eye!
Step 5: Cooling the Cookies
Once baked, transfer the cookies carefully to a wire rack using a spatula and let them cool completely before filling. This step is key — the filling melts if the cookies are warm, and no one wants a messy sandwich.
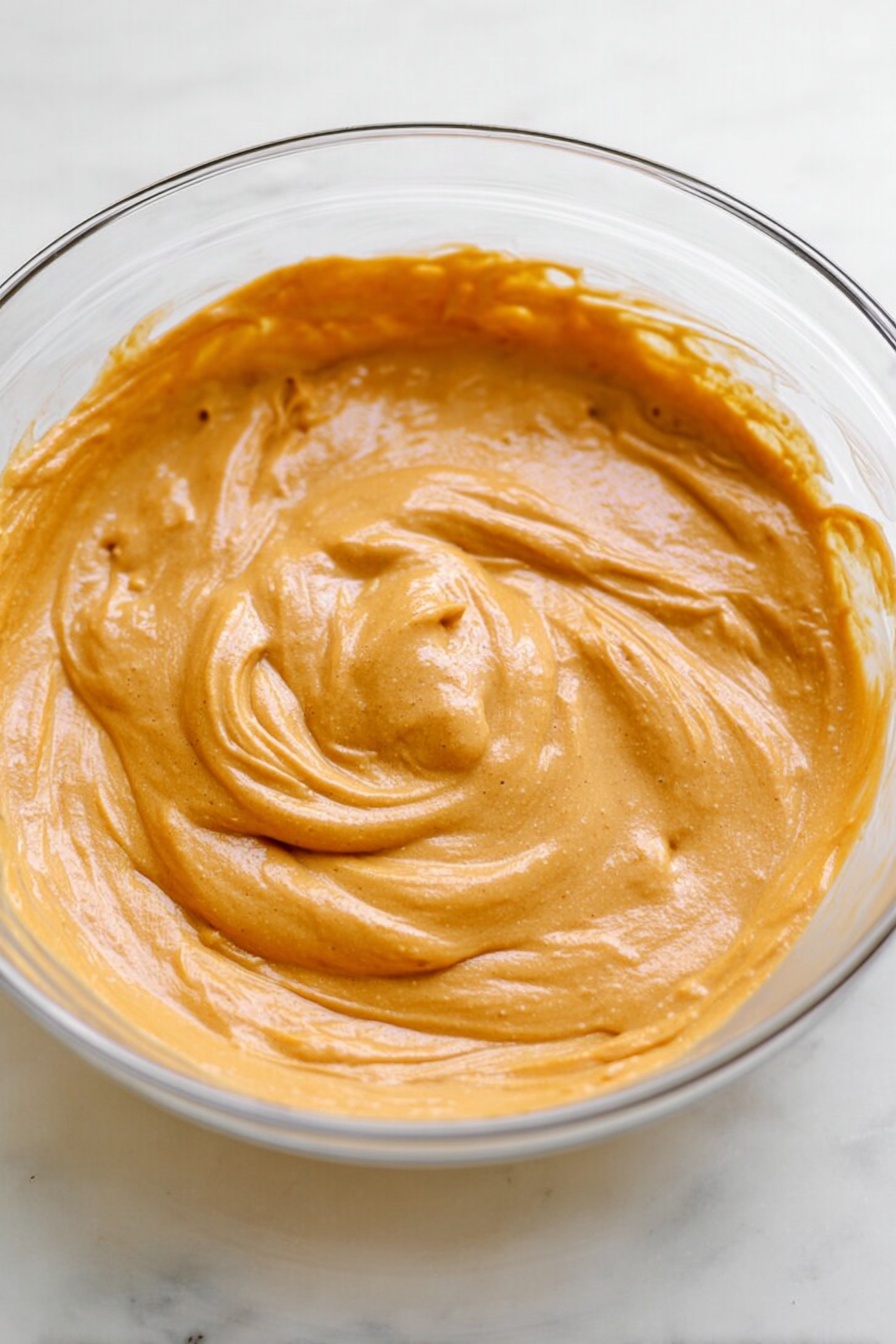
Step 6: Making the Marshmallow Cream Cheese Filling
In a clean bowl, combine softened cream cheese and marshmallow cream. I like to use an electric mixer here to get the fluffiest, smoothest filling possible. Then, gently mix in powdered sugar and vanilla until you have a glossy, pipeable frosting.
Step 7: Assembly
Spoon the filling into a piping bag or a sturdy resealable bag, snip off a corner, and pipe a generous dollop onto the flat side of half the cookies. Top with the remaining cookies, pressing gently to sandwich. Refrigerate the whoopie pies for at least 30 minutes to let the filling firm up before serving.
Top Tip
From my countless batches of this Pumpkin Whoopie Pies with Marshmallow Cream Filling Recipe, I’ve learned a few tricks that really help you nail the perfect texture and flavor every time.
- Don’t Skip the Cooling: The cookies must be completely cool before adding filling or it’ll melt and get messy.
- Use Fresh Pumpkin Pie Spice: It makes a huge difference to flavor — if you don’t have a pre-made blend, mix cinnamon, nutmeg, ginger, and cloves fresh.
- One Pan at a Time: Baking one sheet at a time keeps oven temp steady for even baking and soft texture.
- Softened Cream Cheese: Don’t rush this—room temp cream cheese blends easily resulting in a silky smooth filling.
How to Serve Pumpkin Whoopie Pies with Marshmallow Cream Filling Recipe
Garnishes
I love to dust these pumpkin whoopie pies with a sprinkle of cinnamon or a tiny pinch of pumpkin pie spice just before serving—that little touch adds a beautiful aroma and a hint of extra warmth. Sometimes, a drizzle of melted white chocolate makes them feel extra special for guests.
Side Dishes
Pair these with a warm mug of spiced chai or cinnamon-infused coffee for a cozy treat. They also work wonderfully alongside a lightly spiced apple cider, making for an inviting fall dessert spread.
Creative Ways to Present
For holiday parties, I’ve arranged these whoopie pies on tiered trays with autumn leaves and mini pumpkins scattered around. Another favorite way is wrapping each whoopie pie in wax paper tied with twine for gifting—such a thoughtful homemade touch!
Make Ahead and Storage
Storing Leftovers
I keep these in an airtight container in the fridge for up to 5 days. The filling stays perfectly creamy, and the cookies don’t dry out. Just bring to room temperature before enjoying again to let their softness shine through.
Freezing
Freezing works great too! You can freeze the baked cookies before assembling or freeze the fully assembled whoopie pies in a single layer, wrapped well. When ready, thaw overnight in the fridge and serve the next day for fresh taste.
Reheating
I usually let them reach room temp naturally. If you want a warmer treat, pop a whoopie pie in the microwave for 10-15 seconds—but be careful not to melt the filling. It’s cozy and soft, just how I love it!
Frequently Asked Questions:
It’s best to use pure pumpkin puree rather than pumpkin pie filling, which contains added sugar and spices that will affect the texture and balance of the cookies. Using pure pumpkin lets you control the sweetness and flavor better.
Make sure not to overbake the cookies—they should be just set and soft in the center. Also, using vegetable oil rather than butter helps keep the texture tender and moist. Store whoopie pies in an airtight container to prevent drying out.
Absolutely! You can bake the cookies a day or two ahead and store them in an airtight container, then make and pipe the filling when you’re ready to assemble. You can even prepare the whole whoopie pies a day in advance and refrigerate them to save time on the party day.
Yes! Try using dairy-free cream cheese alternatives and marshmallow fluff or cream that’s also dairy-free (check the label). The texture will be similar, and the sweetness balance remains delicious.
Final Thoughts
This Pumpkin Whoopie Pies with Marshmallow Cream Filling Recipe holds a special place in my heart, partly because it’s so festive and inviting, but mostly because it’s easy enough to make that I can share it with friends without added stress. Trust me, once you try these soft, spicy cookies with that fluffy filling, they’ll be a go-to recipe you’ll want to bake again and again. Grab your mixing bowl and pumpkin—let’s make some magic happen!
Print
Pumpkin Whoopie Pies with Marshmallow Cream Filling Recipe
- Prep Time: 30 minutes
- Cook Time: 10 minutes
- Total Time: 1 hour 40 minutes
- Yield: 54 cookies
- Category: Dessert
- Method: Baking
- Cuisine: American
- Diet: Vegetarian
Description
These Pumpkin Whoopie Pies are soft, spicy, and filled with a creamy marshmallow cream cheese filling, perfect for fall gatherings and holiday treats.
Ingredients
Cookies:
- 1 cup brown sugar
- 1 cup sugar
- ⅔ cup vegetable oil
- 2 eggs
- 1 tablespoon vanilla
- 1 15 ounce can pumpkin puree
- 3 cups all purpose flour
- 1 tablespoon pumpkin pie spice
- 1 teaspoon baking soda
- 1 teaspoon baking powder
- 1 teaspoon salt
Marshmallow Cream Cheese Filling:
- 8 ounces cream cheese softened
- 1 cup marshmallow cream
- ¾ cup powdered sugar
- 1 teaspoon vanilla
Instructions
- Preheat and Prepare: Preheat oven to 350℉ and line baking sheets with parchment paper or silicone baking mats to prevent sticking.
- Mix Wet Ingredients: In a large mixing bowl, combine the brown sugar, sugar, vegetable oil, eggs, and vanilla, mixing until smooth and well blended.
- Add Pumpkin Puree: Stir in the pumpkin puree until evenly incorporated into the wet mixture.
- Incorporate Dry Ingredients: Add the all-purpose flour, pumpkin pie spice, baking soda, baking powder, and salt to the wet ingredients and stir until just combined, creating the cookie dough.
- Scoop and Bake Cookies: Using a size 40 cookie scoop (about 1 ½ tablespoons), scoop the dough onto prepared baking sheets. Bake one pan at a time for 10 minutes until cookies are set.
- Cool Cookies: Remove cookies from oven and transfer to a wire rack to cool completely before filling.
- Prepare Filling: In a large bowl, mix softened cream cheese and marshmallow cream by hand or with an electric mixer until smooth and creamy.
- Add Sweeteners: Stir in powdered sugar and vanilla extract until the filling is smooth and spreadable.
- Fill Piping Bag: Spoon the filling into a piping bag or large resealable plastic bag, then cut off the tip for piping.
- Assemble Whoopie Pies: Pipe the filling onto the flat side of half the cookies, then top with the remaining cookies to form sandwiches.
Notes
- Use a size 40 cookie scoop (approximately 1 ½ tablespoons) for uniform cookies.
- Refrigerate assembled whoopie pies for up to 5 days to maintain freshness.
- Freeze whoopie pies for up to 3 months; alternatively, freeze the unassembled cookies and fill them later.
Nutrition
- Serving Size: 1 sandwich (2 cookies with filling)
- Calories: 250 kcal
- Sugar: 18 g
- Sodium: 150 mg
- Fat: 10 g
- Saturated Fat: 4 g
- Unsaturated Fat: 5 g
- Trans Fat: 0 g
- Carbohydrates: 36 g
- Fiber: 1 g
- Protein: 3 g
- Cholesterol: 25 mg


Leave a Reply